
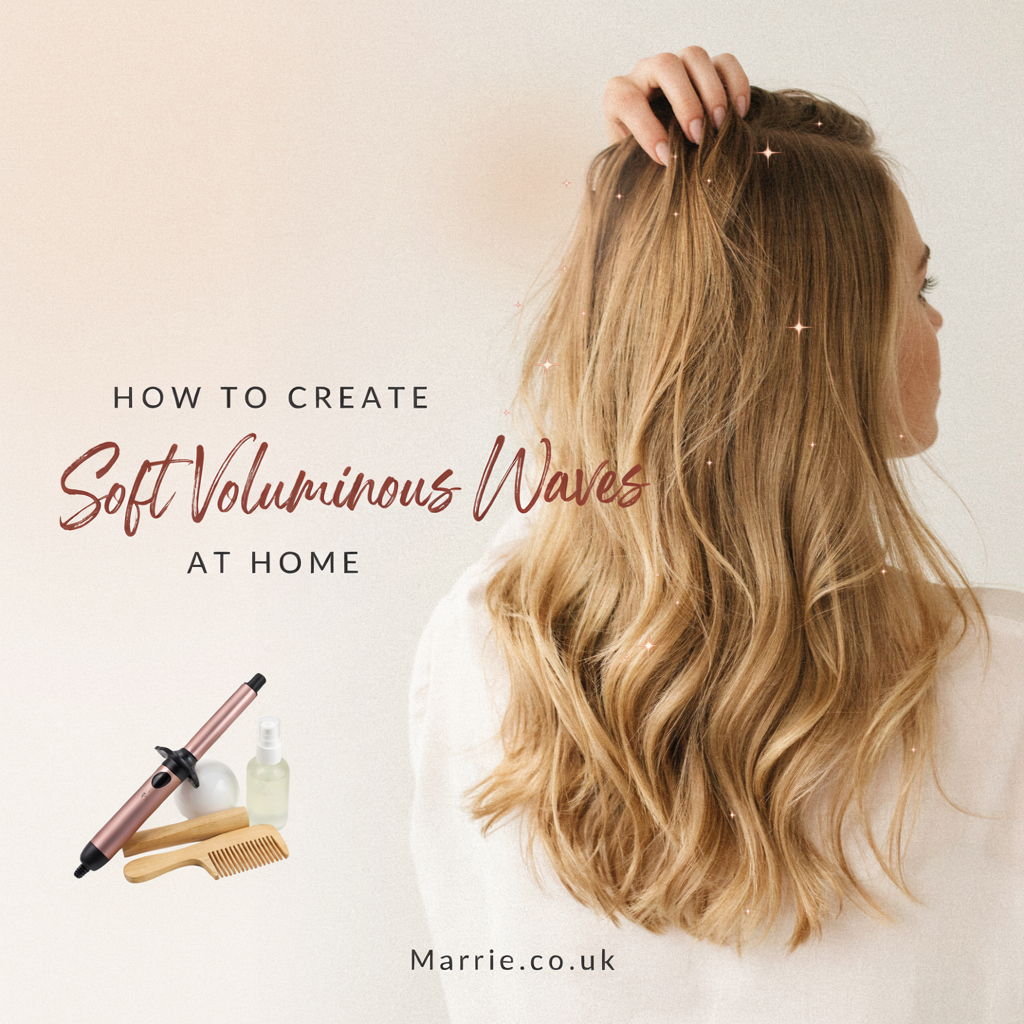
Some hairstyles feel dressed up without looking too polished. Soft, voluminous waves are one of them: loose bends through the lengths, a little lift around the crown and movement that frames your face.
The look in our inspiration photo combines a soft centre part with flowing waves and fuller curls towards the ends. It has a relaxed finish, with a few fly away adding to its natural feel.
You can create a similar effect at home by working in sections, letting each curl cool and gently loosening the finished style. Your hair length, texture and haircut will influence the result, so aim for the same softness and movement rather than an identical copy.
How to Create Soft Voluminous Waves at Home
What hairstyle is this?
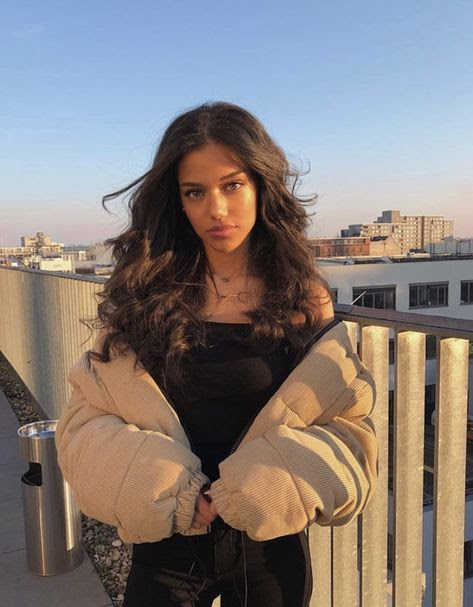
The best description is long, soft, voluminous waves with face-framing movement. The overall effect resembles a loose, tousled blowout, although a photo alone cannot tell us which styling technique was used.
The key features are:
- A centre or slightly off-centre parting.
- Soft volume around the top and sides.
- Loose waves through the mid-lengths.
- More defined bends and curls towards the ends.
- Front sections that sweep away from the face.
Long layers can help create this flowing shape. If your hair is mostly one length, you can still achieve soft waves, although they may sit differently.
What you will need
- A detangling brush or wide-tooth comb.
- A heat protectant suitable for your chosen styling tool.
- Sectioning clips to keep unused hair out of the way.
- A curling tong or wand, ideally with a medium-to-large barrel for loose waves.
- Optional lightweight mousse for body.
- Flexible-hold hairspray.
- A small amount of finishing serum, if needed.
A barrel around 25–32 mm is a useful starting point for longer hair. Smaller barrels create more defined curls; larger barrels give a looser bend. Use a tool and setting appropriate for your hair and follow its instructions.
Allow roughly 30–45 minutes once your hair is dry, depending on its length, thickness and your experience.
Step 1: Prepare your hair for movement
If you are starting with freshly washed hair, condition mainly through the mid-lengths and ends. Rinse thoroughly so the hair does not feel coated.
Gently squeeze out excess water and detangle from the ends upwards. If your hair needs more body, distribute a small amount of lightweight mousse through damp hair, following the product directions.
Keep richer oils and heavy styling creams away from the roots if they tend to leave your hair flat.
You can also start with already dry hair, provided it is detangled and suitable for heat styling. You do not need to wash it again just for this look.
Step 2: Apply heat protectant and dry completely
Apply heat protectant according to its label. Some products are intended for damp hair, while others can be used before styling dry hair.
Dry your hair completely before using a conventional curling tong or wand. If you applied a spray to dry hair, let it dry fully too.
For a little lift, use your fingers or a brush to raise the roots as you blow-dry. You are creating a manageable base, so there is no need to make every strand perfectly straight.
Step 3: Create your parting and divide into sections
Make a centre part or move it slightly to one side if that feels more flattering or comfortable.
Divide your hair into a lower section and an upper section. Clip the upper hair out of the way. If your hair is thick, divide it into three horizontal sections instead.
Start at the bottom and work upwards. Smaller, manageable sections make it easier to style the back without repeatedly heating the same hair.
Step 4: Curl the lower lengths
Take a section approximately 2–3 cm wide. Use smaller sections if your hair is particularly thick.
Curl from around the mid-lengths downwards, keeping the hot tool away from your scalp, ears and neck. Follow the tool’s guidance for placement and contact time, and use the lowest effective heat setting for your hair.
For a softer finish, avoid winding every curl tightly from the root. Let the upper section remain relatively relaxed and concentrate the movement through the lengths.
Release each curl carefully without pulling it straight. Continue around the lower section. You can alternate the curl direction through the back and sides to encourage a more tousled finish.
Step 5: Style the upper sections
Release the next layer and repeat the process. Keep the sections manageable and avoid curling pieces that have already been styled.
Around the crown, allow a little more movement higher up the strand if you want extra fullness. Keep the tool safely away from your scalp and avoid holding it in one place longer than instructed.
The curls may look more defined than the inspiration image at this stage. That is expected: you will soften them after they cool.
Step 6: Sweep the front pieces away from your face
Style the front sections last. Curl each side away from your face, placing the bend where you want the hair to open out around your cheekbones or jaw.
Release gently and leave the section alone to cool. If you have shorter face-framing pieces, a loose bend may be enough. You do not need a full ringlet beside your face.
This outward movement helps give the style its open, flowing shape.
Step 7: Let the curls cool completely
Resist the urge to brush immediately. Give the curls time to cool before separating them.
If your hair tends to lose its shape quickly, you can loosely support freshly formed curls with suitable styling clips while they cool. Avoid tight clips that leave marks.
Cooling is part of the styling process, so allow time for it before deciding whether a section needs another pass.
Step 8: Loosen into soft waves
Once the hair is cool, gently separate the curls with your fingers. For a smoother finish, try one light pass with a wide-tooth comb.
Work gradually and stop when the hair has the amount of movement you like. Too much brushing can remove definition or create unwanted fluffiness, particularly on naturally curly or frizz-prone hair.
Use your fingers to arrange the front sections and lightly lift the roots. Leave a little irregularity: the appeal of this style is its relaxed movement.
Step 9: Finish with a light touch
Mist with flexible-hold hairspray, following the recommended application distance on the label.
If the ends need smoothing, rub a tiny amount of serum between your palms and lightly skim the lower lengths. Add more only if needed.
Avoid flattening the crown as you smooth the surface. The finished result should move freely when you turn your head.
Adjusting the look for your hair
Fine hair: Use light products and let the curls cool before touching them. A slightly more defined initial curl may give you room for it to relax.
Thick hair: Work in more sections. Making each section manageable is more useful than repeatedly curling a large piece that has not styled evenly.
Naturally wavy or curly hair: You may be able to work with your own texture and add definition to just a few pieces. Finger separation can preserve more texture than brushing.
Shoulder-length hair: Focus on soft bends and outward movement around the face. Expect a shorter, fuller silhouette than the long-haired inspiration.
Add a Marrie finishing touch
Enjoy the waves worn loose, or turn them into a simple half-up style. Gather a small section from each side and secure it at the back with a barrette that comfortably holds that amount of hair.
Leave the front pieces relaxed and ease the hair above the clip slightly for a softer shape. A slim barrette can add a subtle finishing detail; choose one suited to your hair thickness and the section you want to hold.
Explore hair accessories at Marrie to find a finishing touch for your everyday hairstyles.
Frequently asked questions
Do I need layers for soft, voluminous waves?
No. Layers can make the shape feel lighter and encourage face-framing movement, but you can create loose waves on one-length hair too.
Why do my waves drop quickly?
Heavy products, large sections and brushing before the hair cools can all contribute. Try lighter preparation, smaller sections and a longer cooling period. Natural texture and hair length also affect hold.
Can I create a similar look without heat?
Heatless rollers or a soft curling ribbon can create loose waves, although the shape will differ. Follow the accessory’s instructions and avoid wrapping the hair so tightly that it pulls at your scalp.
Should every curl go in the same direction?
For this relaxed look, you can alternate directions through the back while styling the front pieces away from your face. Curling everything in the same direction usually gives a more uniform finish once brushed out.
Can I wear a hair clip without hiding the waves?
Yes. Clip back a small section on one side or create a loose half-up style. Leave most of the lengths free so the movement stays visible.